Branches
Branches are essential and improve our workflow immensely.
When working on a project we add features as we progress on it, and sometimes those features break our layout or code that was functioning without issues up to that moment if we work on a single branch.

The problem with this approach is clear, and branches are like alternative timelines.
They allow us to create separate contexts where we can try new things, or even work on multiple ideas in parallel.
If we make changes on one branch, they do not impact the other branches (until we merge the changes)

The Master (Main) Branch
In git we are always working on a branch. The default branch name is master, recently renamed on GitHub to main (git itself still uses 'master' as default).
The master branch doesn't do anything special or has any special powers. From Git's perspective, the master branch is just like any other branch. It does not have to hold the master copy of your project.
Many people designate the master branch as their source of truth or the official branch for their codebase, but that is left to you to decide.
Branching and HEAD
HEAD is simply a pointer that refers to the current "location" in your repository. It points to a particular branch reference.
So far HEAD always points to the latest commit you made on the master branch, although we can move around and HEAD can change!

New branches get created from the current HEAD
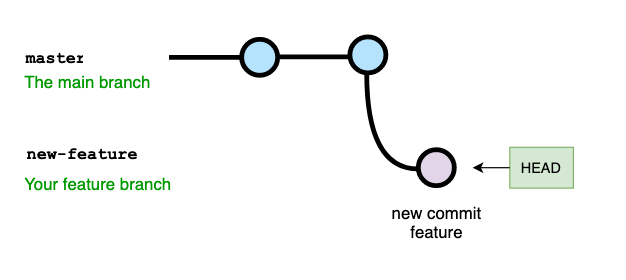
And switching back to master simply moves the HEAD
Commands
git branchUse git branch to view your existing branches. The default branch in every git repo is master, though you can configure this.
Look for the * which indicates the branch you are currently on.
git branch <branch-name>Use git branch <branch-name> to make a new branch based upon the current HEAD.
This just creates the branch. It does not switch you to that branch (the HEAD stays the same).
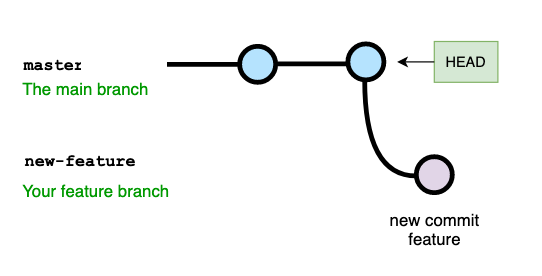
git switch <branch-name>Once you have created a new branch use git switch <branch-name> to switch to it.
This effectively makes HEAD point to the last commit of that branch.
Now everytime we make a new commit, it only exists on the new branch, and not on master!
git switch -c <branch-name>Use git switch with the -c flag to create a new branch AND switch to it all in one go.
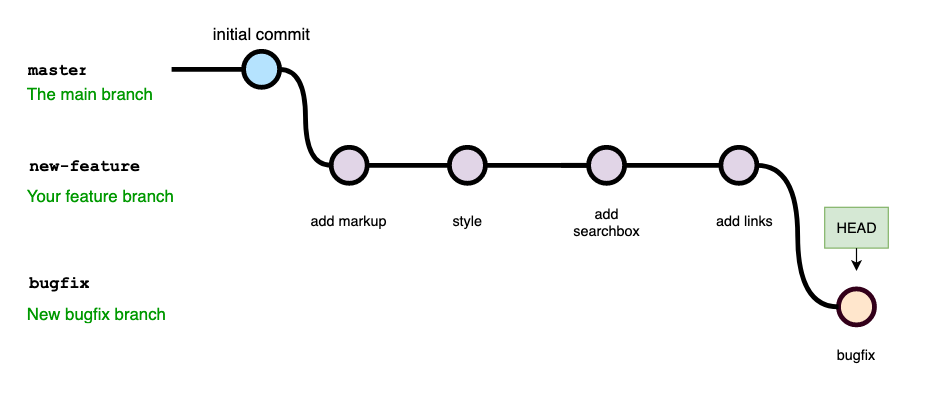
If you branch further from this branch, the new one includes all the commits from the one from which it was created.
Switch and Checkout, what's the difference?
Historically we used git checkout <branch-name> to switch branches. This still works, but the checkout command does a million additional things, so the decision was made by git maintainers to add a standalone switch command which is much simpler.
There are a ton of (older) tutorials and docs using checkout rather than switch. Both work for our purpose of changing branch.
To change to a branch using checkout use
git checkout <branch-name>To create a branch and switch to it using checkout, use
git checkout -b <branch-name>Don't be confused by the -b flag in git checkout! While switch -c is easy to remember (c stands for 'create') there's no obvious relation between the -b and the fact of creating a branch!
If you can, stick to switch as it's a newer command specifically created for that purpose. We'll discuss all the things git checkout can do for us, which are many!